
thallia
Arduino Sound System with DFPlayer
Project Introduction
Happy September everyone! I actually wrote this post back in July/August, but I had to wait to post it until after my boyfriend’s birthday, so he wouldn’t see what I was working on.
I needed to get his present done before I headed back to college this year, so I decided to make him a small speaker system that worked like a mini mp3 player, and played our favorite songs.
Components
To do this, I used only a few simple things:
| Components | Quantity |
|---|---|
| Arduino UNO | 1 |
| DFPlayer Mini | 1 |
| LCD Screen | 1 |
| 8GB MicroSD card | 1 |
| Audio Amp Board | 1 |
| Speakers (5W) | 2 |
| 1k Resistor | 2 |
| 10k Potentiometer | 1 |
| Pushbuttons | 3 |
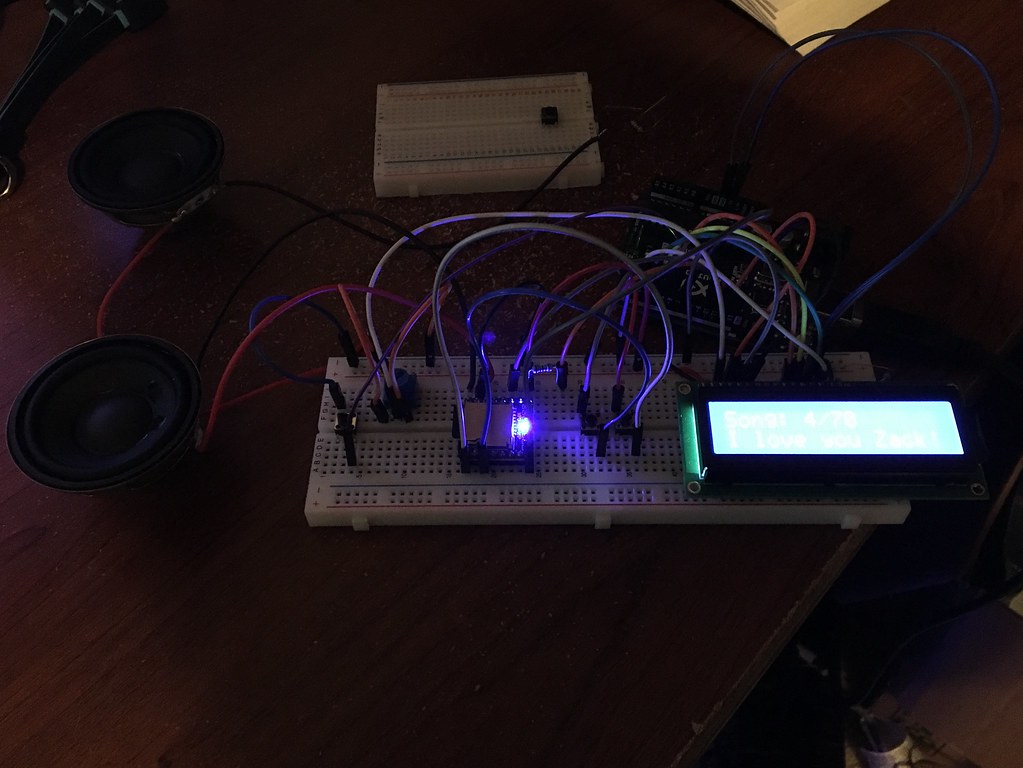
The arduino is the brains, the DFPlayer is the module that reads the files from the SD card and plays through the audio amplifier, and the LCD screen displays the status of everything, and a little message :)
Schematic

Breadboard

I had quite a few issues getting the DFPlayer module to work and initialize, so if you’re having problems, double check this list:
- the DFPlayer module is powered by 5V
- DFPlayer is powered by Arduino (if not, make sure there’s a common ground at the very least)
- Triple check your RX/TX connections, DFPlayer’s RX goes to Arduinos TX, and vice versa.
- Isolate the module (in the code and the circuit) and see if you can test the DFPlayer by itself, first.
Try solely getting to work with the button suggestion in this link(part 3): Look for I/O Mode
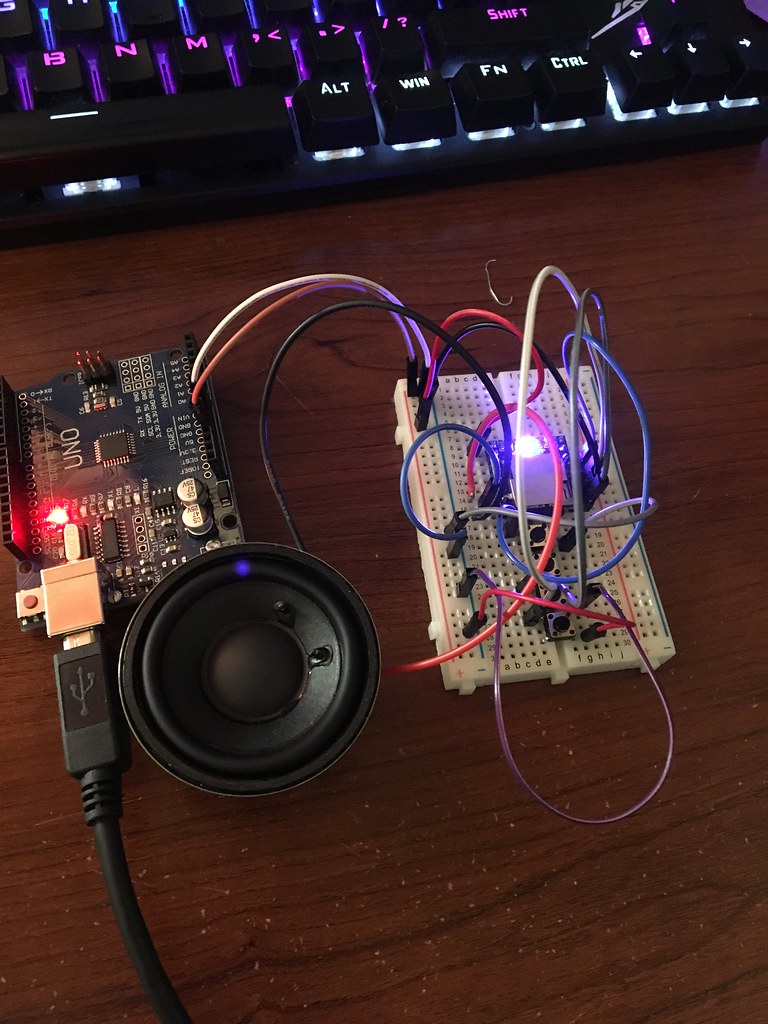
This is what my setup looked like when I was just testing it by itself, with no arduino attached (aside from power).
DFPlayer SD Card files
Your DFPlayer’s SD card needs to be formatted and set up correctly, or else it won’t be able to read the audio files and play them.
Format your SD card to be FAT16 or FAT32, I personally used FAT32. After that, I used simple mp3 files I had from my own music library, and copied them to the SD card. By hand (or script), you’ll have to change the file names to be prefixed with 0001_file_name.mp3, climbing up in number like so: 0002_file_name.mp3, 0003_file_name.mp3, and so on. This lets the DFPlayer know which files to play in what order.
Arduino Code
You can find my code file here on Gitlab.
I used a few libraries:
SoftwareSerial and LiquidCrystal should already come installed if you have the Arduino IDE, so you should just be able to #include them and you’ll be good. The DFRobotDFPlayerMini you’ll either have to download from Github and unzip into your libraries folder, or install it via the Library Manger in the Arduino IDE.
/*
Notes:

 - DFPlayer MUST be connected to the same power supply as the arduino!
 - SD Card needs to have FAT format
 - you can have music files in the root directory, must be in xxxx.mp3 format (don't worry about wav)
 - make sure TX and RX are connected to the corresponding RX and TX on the DFPlayer

*/

// ************************
//   Libraries
// ************************

#include "Arduino.h"
#include "SoftwareSerial.h"
#include "DFRobotDFPlayerMini.h" // music library
#include "LiquidCrystal.h" // display library


// ************************
//   Variables & Inits
// ************************

SoftwareSerial mySerial(10, 11); // RX, TX DFPlayerMini_Fast
DFRobotDFPlayerMini music;
LiquidCrystal lcd(12, 13, 5, 4, 3, 2); // initializes LCD object to "lcd"

int songNumber = 1; // start on song 1
int currentVolume;

int playPause = 6; // pin 6

boolean isPlaying = false;
boolean currentState;


// **********************
//   Setup
// **********************
void setup(){

  pinMode(playPause, INPUT_PULLUP); // button for playing/pausing
  pinMode(isPlaying, INPUT); // for busy signal

  Serial.begin(9600); // for debugging
  mySerial.begin(9600);

  if (!music.begin(mySerial)) {  //Use softwareSerial to communicate with mp3.
    Serial.println(F("Unable to begin:"));
    Serial.println(F("1.Please recheck the connection!"));
    Serial.println(F("2.Please insert the SD card!"));
    while(true){
      delay(0);
    }
  }
  Serial.println(F("\nDFPlayer Mini online."));

  music.volume(15); // set the initial volume
  music.play(1); // start playing the first song
  isPlaying = true;

  lcd.begin(16, 2); // tells how many columns and rows for the LCD screen
  lcd.print("Song: ");
  lcd.print(songNumber);
  lcd.print("/70");
  lcd.setCursor(0,1);
  lcd.print("I love you Zack!");

  music.enableLoopAll(); // this plays through all the songs in the SD card :)

}

// **************************
//  Main Loop
// **************************

void loop(){

  if (digitalRead(playPause) == LOW) { // pause the music if playing, and play if paused
    if (isPlaying) {
        music.pause();
        isPlaying = false;
        Serial.println("Paused..");
    } else {
        isPlaying = true;
        music.start();
        Serial.println("Playing..");
    }
  }

  delay(1000);
  songNumber = music.readCurrentFileNumber(); // update songNumber based on current song
  updateSongDisplay(songNumber);


}

// ************************
//  User Defined Functions
// ************************

void updateSongDisplay(int song){
  lcd.setCursor(0,0);
  lcd.print("Song: ");
  lcd.print(song);
  lcd.print("/70 ");
  //Serial.print(songNumber);
}
Prototype
Once I verified that the breadboarded version would work, I soldered everything together with some protoboard:

I was able to fire it up as I went along, making sure everything still worked.


3D Model
My first model I assumed I was only going to have one speaker, and 5 buttons. This was the design I came up with:

Once I realized my first design wouldn’t work and I had two smaller speakers instead of one large one, I turned it into a more square-like model, with the two speakers on the bottom, a new LCD in the middle, and less buttons at the top:

Here’s the STL file.
Finished Product
Because I was limited by time, I had to use red cardboard as the backing material for it, but it looked pretty okay :)

Here’s a working video :)
As always, you can find my entire repository with the model, code, and schematic on my Gitlab.
If you have any questions, feel free to ask on my discord server, or shoot me an email! Hope y’all enjoyed.
{thallia}