
thallia
Ham Radio : Technician's License
A few months ago, I presented the idea to Gector to set UTW (a friend group of ours) with ham radio. We put it on our list of projects to do, and left it on the back burner.
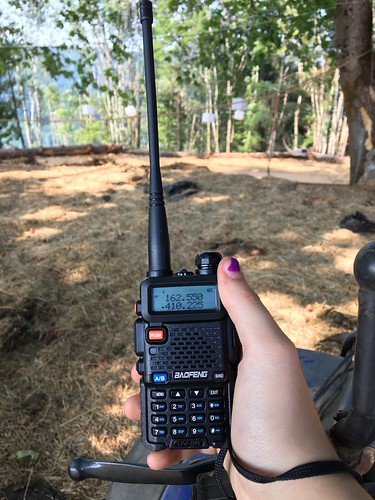
Two weeks ago, Gector’s dad ordered all three of us ham radios as a spontaneous surprise! He bought us small starter radios, Baofeng UV-5Rs.
They got here after a week, and we wanted to get our licenses before I headed to college, so we had a week to prepare.
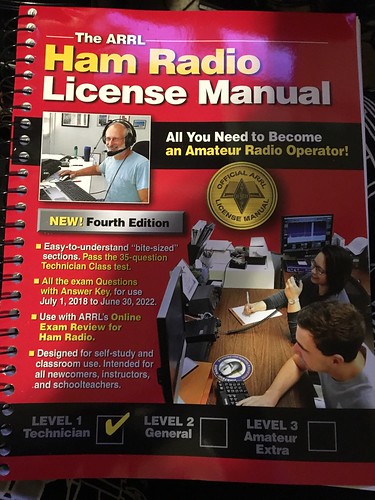
There are three licenses you can test for: Technician, General, and Extra. Technician’s was the easiest, and gives you basic operating privileges on the 2 meter band, 6 meter band, 10 meter band, 1.25 meter band, and a few more. You can see the chart here.
I studied out of this manual:
And with these very helpful practice tests:
You can easily pass the Technician’s test with around 6-10 hours of studying, and very easily if you have a solid background in basic circuit theory.
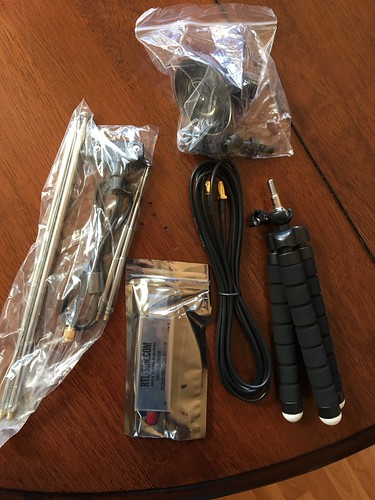
To play with the radios we had while learning about the subject, we got Nagoya NA-771 antennas, which extend the Baofeng’s range, and programming cables to program channels into the radio!

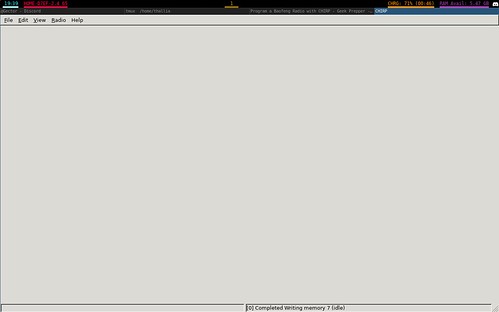
To program the UV-5Rs, you use a software called CHIRP, which you can download here.
    sudo apt-add-repository ppa:dansmith/chirp-snapshots
    sudo apt-get update
    sudo apt-get install chirp-daily
Once that finishes, you can start CHIRP up! You’ll see an empty screen, like this:
Next, you click on the drop-down menu that says Radio. Make sure your radio is off, then go ahead and plug it into a USB port on your computer. Turn it on, and make sure it’s on a frequency that has no activity.
Click on the option Download From Radio, choose the USB port your radio is on, the brand and model, and then it’ll download the currently programmed channels from your radio.
The Baofeng UV-5R has 127 programmable channels, but I’m only using a few for now, since I haven’t found many repeaters to talk to people on (because I can’t until my callsign + license appear in the FCC database). I found my local NOAA (weather) channel and programmed that in, as well as the first five walkie talkie channels (which you can find here).
When I took my licensing test, a nice lady gave me a list of repeaters I was eligible to talk on once I had my call sign, so I programmed one of those in as well. My final setup looked like this:
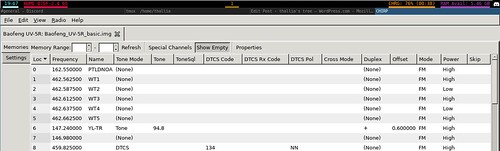
The repeater I looked up had the information of the tone it needed for me to accurately receive, so in the Tone Mode section I selected Tone (as opposed to DCTS amongst other options), and then entered the 94.8 tone selection in that column.
Once that was finished, I selected the Radio tab once more, and hit Upload to Radio. Boom, I officially programmed my radio channels into it :)
Gector, his dad, and I all passed our tests! It takes a little less than a week for our callsigns to appear in the FCC Licensing database, so to pass the time while we can’t transmit, Gector and I got these nifty little USB Software Defined Radio receivers.
There are some tutorials I kinda followed here, but I’ll walk you through what I did as well.
    sudo apt-get update
    sudo apt-get install libusb-1.0-0-dev
Then install the rtl-sdr drivers:
sudo apt-get install rtl-sdr
Once that was done, I ran ` rtl_test ` in the terminal and got this result:
    Found 1 device(s):
      0:  T, , SN:

    Using device 0: Generic RTL2832U OEM
    usb_open error -3
    Please fix the device permissions, e.g. by installing the udev rules file rtl-sdr.rules
    Failed to open rtlsdr device #0.
Which was weird, because the USB was pretty much plug-and-play on my tower when I tested it out. But! I unplugged it, plugged it back in, because I realized it can’t read the device when the drivers had just been installed. Now that they were installed, I had to unplug and replug it to get the correct output:
    Found 1 device(s):
      0:  Realtek, RTL2838UHIDIR, SN: 00000001

    Using device 0: Generic RTL2832U OEM
    Detached kernel driver
    Found Rafael Micro R820T tuner
    Supported gain values (29): 0.0 0.9 1.4 2.7 3.7 7.7 8.7 12.5 14.4 15.7 16.6 19.7 20.7 22.9 25.4 28.0 29.7 32.8 33.8 36.4 37.2 38.6 40.2 42.1 43.4 43.9 44.5 48.0 49.6
    [R82XX] PLL not locked!
    Sampling at 2048000 S/s.

    Info: This tool will continuously read from the device, and report if
    samples get lost. If you observe no further output, everything is fine.

    Reading samples in async mode...
Which is the correct output! You can Control+C to get out of the test.
Now we need a software that can interface and read this device. GQRX was the first recommended one, which you can download for your OS here: http://gqrx.dk/download
Or if you have linux, you can just run:
sudo apt install gqrx-sdr
Once that’s complete, you can set up the antenna! Either outside or inside works good, I tend to find that outside works better because there’s less physical obstructions for the signals, e.g. less static.
Start gqrx, and fill out the basic info of your device.
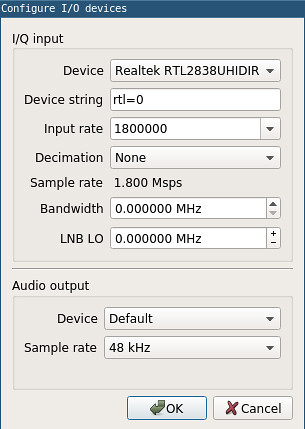
Once it looks like that, hit ok, and voila! In the top left corner there’s a pause/play button, and when you press it, it should start looking something like this:
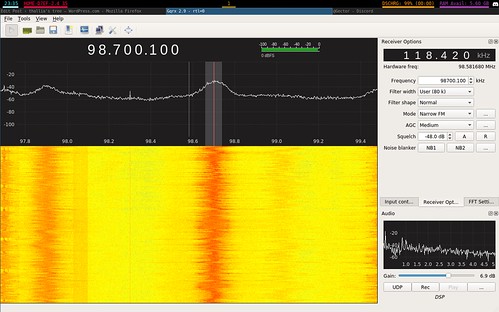
As you can see, there’s a lot of plain static here. You’ll know when you find signals, they look similar to or larger than this (tuned into 98.7 FM radio):
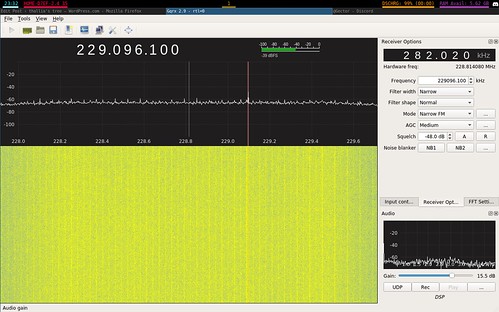
Or here, where the smaller signal on the left is picture data (you can tell by the sound), and the signal on the right is the NOAA channel:
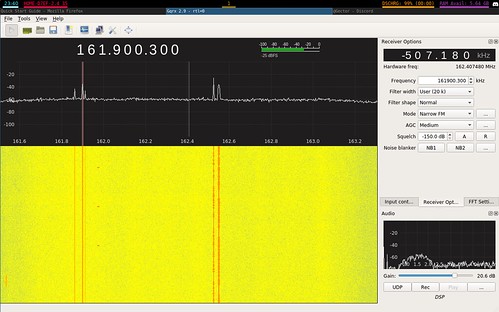
Pretty neat, huh?
Because there’s a lot of static, you’ve gotta adjust the squelch, the gain, and the mode every so often to fit what kind of signal you’re picking up. I typically have the gain close to 10dB, because that’s where I can hear voice transmissions the clearest. Other transmissions come in super clear with the dB all the way up, so you can adjust that based on what signal you’re receiving. As for squelch, what actually is squelch?
Squelch is typically a circuit in the receiver that blocks incoming static, and waits for a signal to be a higher dB gain than the static. When that signal’s dB gain is higher than the static’s dB, the squelch will un-block the sound and allow you to hear the signal coming through. That way you aren’t trying to listen through static the whole time you’re trying to pick up a signal, which can get annoying.
If you’re tracking a very weak signal, though, leaving the squelch as low as possible helps, because if you have a weak signal it’s often not going to trigger the squelch to allow you to hear it.
As for modes:

AM deals with, obviously, AM signals, which are typically 535kHz to 1600kHz. Narrow FM is the most likely mode to pick up voice transmissions across 110MHz and up. WFM (mono) and WFM (stereo) are great for what we know as FM broadcast radio transmissions, which are from 88 to 108 MHz.
LSB and USB have to do with SSB, Single Side Band, one of the most well known modes of voice transmission on High Frequency bands in radio. LSB stands for Lower Side Band, while USB stands for Upper Side Band. Wikipedia has a great picture for demonstrating the difference between the two:

The carrier is the main signal, surrounded by the LSB and USB. So wherever you’re listening to the frequency, you can change the mode here to see which one sounds better/clearer for your receiver.
CW stands for “continuous wave”, which is basically International Morse Code. Again, the -L and -U stand for the Lower and Upper sidebands of CW. I’ve come across more CW in the narrow FM mode than the CW modes, so I’m not sure what’s up with that. I’ll have to play around with it some more to see if there’s a huge difference.
And there you have it! Changing up the frequency, the gain, the modes, and the squelch can help you tune your antennas to hear the best stuff. If you’re ever curious about what certain signals sound like, Gector found this great resource to start identifying the different signals and what they sound like: https://www.nonstopsystems.com/radio/radio-sounds-orig.html
I’m hoping to get these antennas somewhere higher up so I can receive better signals, but with moving into college this week it’s going to have to wait a little bit. I should have my call sign in these next few days as well, so stay tuned! (no pun intended…maybe.)
Here is a great tutorial on the rest of what you can do with the RTL-SDR USB.
happy hamming!
{thallia}