
thallia
ESP32 with Blynk - Lighting an LED over wifi
Recently, my friend Gector lent me a new microcontroller called the ESP32. They are fairly new to the market and have super cool wifi, bluetooth, and networking capabilities! Since I’ve been in the area of networking projects for the past few days, I thought I’d play around with one.
To set it up, I followed Sparkfun’s tutorial.
First, make sure you have the Arduino IDE installed on your OS.
Next, make a directory in your filesystem where you want all the ESP32 stuff to go. Then run all these lovely instructions from this github documentation:
sudo usermod -a -G dialout $USER && \
sudo apt-get install git && \
wget https://bootstrap.pypa.io/get-pip.py && \
sudo python get-pip.py && \
sudo pip install pyserial && \
mkdir -p ~/Arduino/hardware/espressif && \
cd ~/Arduino/hardware/espressif && \
git clone https://github.com/espressif/arduino-esp32.git esp32 && \
cd esp32 && \
git submodule update --init --recursive && \
cd tools && \
python get.py
Since I didn’t have Arduino.app installed in /Applications/ on my computer, I didn’t have to change some other aspects of my installation. But if you do have that setup, don’t forget to run this:
 cd /Applications/Arduino_*/Contents/java/hardware/
mkdir -p espressif && \
cd espressif && \
git clone https://github.com/espressif/arduino-esp32.git esp32 && \
cd esp32 && \
git submodule update --init --recursive && \
cd tools && \
python get.py
Once done, cd /esp32/tools and run python get.py.
Now you can connect your ESP32 to your computer!
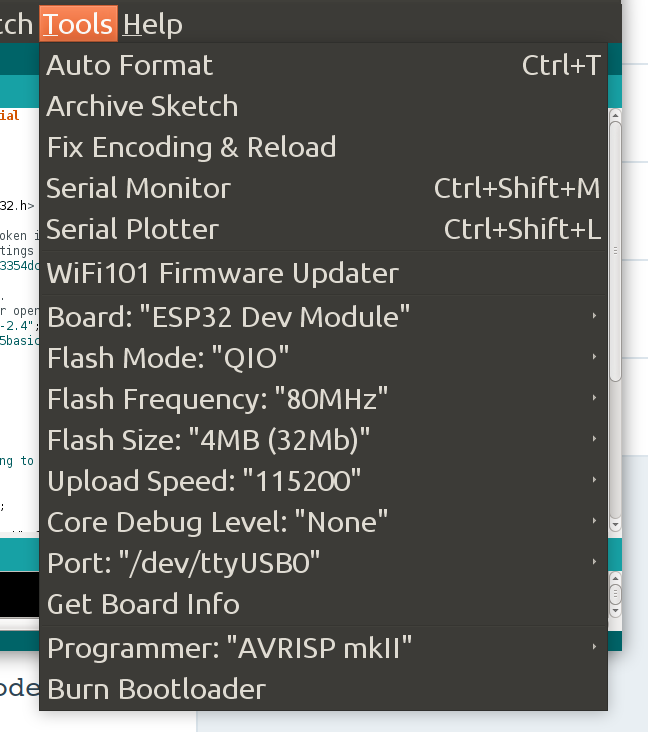
In the Arduino IDE, under Tools, select ESP32 Dev Module as your board. Make sure you have the right Port selected, too.
My setup looks like this:
Once finished, I installed the Blynk app on my iPhone. Sign up with an email and password, and create a New Project.
Give your project a name, choose the ESP32 as the device and WiFi as the connection type. Tap create project when you’re finished!
This will direct you to a black screen. Tap anywhere to add a “widget”, where you’ll select the Button option. It’ll add the button to your screen. Tap on it to edit the settings.
In settings, in the empty PIN field, put Digital GP21. Save/Exit the settings, and you’re almost finished.
Before we can see any action, we’ve got to download the Blynk Arduino Library. On the Blynk Github Page, you can clone the repo into your Arduino folder, or you can download the ZIP file and extract it into the Arduino folder.
In the Arduino IDE, go to Sketch > Include Library > Blynk and the library should be imported.
After that, download the sample code found in this tutorial.
Then replace “Your auth token” with the authorization code sent to you in your email for the project in this code block:
// You should get Auth Token in the Blynk App.
// Go to the Project Settings (nut icon).
char auth[] = "Your Auth Code Here";
And again in this line farther down in the file:
Blynk.begin("Your Auth Code Here", ssid, pass);
Near the beginning of the file, add your Network WIFI name and password where it says:
char ssid[] = "Network name";
char pass[] = "Network password";
Save the file and load it into the Arduino IDE as a sketch, but don’t run it yet.
Make sure your ESP32 is plugged into the computer. Now stick it into a breadboard and find an LED. Plug the LED’s long (anode) led into Pin 21 of the ESP32, and the short (cathode) leg into pin GND. There are GPIO charts you can find on the interwebs if there aren’t any names on your board.
The moment of truth comes…upload the code onto the ESP32 and open the Serial Monitor (Tools > Serial Monitor). If all goes well, your board should connect to your wifi and say something that looks like this:
rst:0x1 (POWERON_RESET),boot:0x13 (SPI_FAST_FLASH_BOOT)
configsip: 0, SPIWP:0xee
clk_drv:0x00,q_drv:0x00,d_drv:0x00,cs0_drv:0x00,hd_drv:0x00,wp_drv:0x00
mode:DIO, clock div:1
load:0x3fff0018,len:4
load:0x3fff001c,len:956
load:0x40078000,len:0
load:0x40078000,len:13076
entry 0x40078ad0
Connecting to HOME-D7EF-2.4
..WiFi connected
[1075] Connecting to HOME-D7EF-2.4
[1075] Connected to WiFi
[1075] IP: 10.0.0.175
[1075]
___  __          __
/ _ )/ /_ _____  / /__
/ _  / / // / _ \/  '_/
/____/_/\_, /_//_/_/\_\
/___/ v0.5.0-beta on ESP32`

[5001] Connecting to blynk-cloud.com:8442
[5241] Ready (ping: 116ms).
If you run into trouble, don’t worry. If it can’t upload the code due to permissions issues, open a terminal and run:
sudo chmod 666 /path/to/port
If you get an error about an invalid auth code like I did, make sure all your devices are on the same network as the ESP32, generate a new auth code, and double check your setup. If you’re still having issues, take a look at Sparkfun’s tutorial I mentioned at the beginning of this article. They have a few resources I may not have mentioned.
In the Blynk app press the Play triangle in the top right hand corner. It should tell you whether or not the WiFi LED is connected or not, and once it is, go ahead and press your button, and the LED will light up!
So much excitement for something so small and cute, but it’s sure fun to play with.
{thallia}
P.S. I have a discord server where we discuss and solve problems like this! If you’re having trouble setting up your config or want to share your success, we’d love to see it! Come join us and create a digital hackerspace community :) Join here!